Are you struggling with a Toro lawn mower that just won’t start or runs erratically? The culprit might be a dirty carburetor.
Cleaning it could be the simple fix you need. Many lawn mower issues stem from this often-overlooked component. By addressing it, you can restore your mower to its optimal performance, saving you time and frustration. In this guide, you’ll discover the step-by-step process to clean your Toro lawn mower carburetor easily and effectively.
Whether you’re a seasoned DIY enthusiast or a first-time mower owner, this approach is designed with you in mind. Imagine the satisfaction of hearing your mower roar back to life, ready to tackle your lawn with ease. Keep reading to unlock the secrets to a smooth-running Toro lawn mower and reclaim your weekends for what truly matters.
Quick Navigation
Tools And Materials Needed
To clean a Toro lawn mower carburetor, gather these tools. A screwdriver is essential for removing parts. You will need a wrench for loosening nuts. Gloves protect your hands from dirt and oil. A clean cloth helps wipe off grime. Carburetor cleaner is important for removing deposits. A small brush can reach tight spaces. Keep a bucket handy for catching any spills. Safety goggles protect your eyes from splashes. Finally, have a container ready for holding small parts. Make sure everything is organized before starting.
Safety Precautions
Safety is very important. Always wear gloves to protect your hands. Use goggles to keep your eyes safe. Ensure the mower is turned off. Remove the spark plug before starting. This prevents accidents. Work in a well-ventilated area. Breathing fresh air is good. Avoid smoking near the mower. Gasoline can catch fire easily. Keep tools nearby. A wrench and screwdriver are helpful. Have rags ready for cleaning. Patience is key. Work slowly and carefully. Double-check each step. Safety first, always.
Locating The Carburetor
First, make sure your lawn mower is turned off. The carburetor is usually near the engine. Look for a rectangular or round part. It might be under a cover or shield. Check for a fuel line connecting to it. This line is often black or clear. The carburetor will have small screws on it. These are important for adjustments. You might also see a choke lever. This lever helps start the engine. It’s part of the carburetor too. Sometimes, a fuel bowl is attached at the bottom. This bowl holds extra fuel. Remember, the carburetor is key for engine performance.

Credit: m.youtube.com
Removing The Carburetor
First, turn off the lawn mower. Find the fuel lineleading to the carburetor. Use a pair of pliers to squeeze the clamp on the fuel line. Pull the fuel line away from the carburetor. Be gentle, so you don’t break it. Some fuel might spill, so have a ragready.
Locate the screws that hold the carburetor. Use a screwdriver to loosen these screws. Once loose, carefully remove the carburetor from the engine. Keep the screws in a safe place. Check the gasketfor wear or damage. Replace if needed. The carburetor is now ready for cleaning.
Disassembling The Carburetor
Start by turning off the mower and letting it cool. Locate the carburetor under the air filter. Use a wrench to remove the float bowl. Be gentle to avoid breaking any parts. Keep a small container handy for the screws and bolts. This helps keep everything organized. You might see some fuel inside the bowl. Be careful not to spill it.
Use a screwdriver to remove the jets. They are small and located in the middle. Be careful not to strip them. Next, take out the needles. They can be found near the jets. Both jets and needles are tiny. Place them in a safe spot. This prevents loss and helps during reassembly.
Cleaning The Carburetor Parts
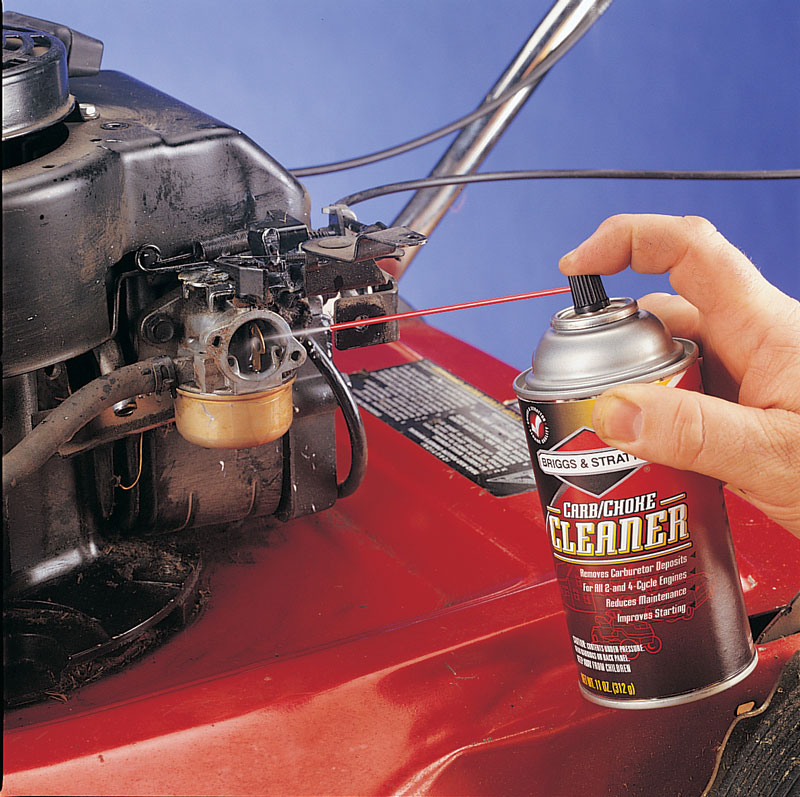
Soak the carburetor parts in a special cleanermade for engines. This helps remove dirt and grime. Use a plastic containerfor soaking. Let the parts sit for a while. This softens tough dirt. Be careful with small parts. They can get lost. Use a magnetic trayto keep them safe.
After soaking, scrub the parts gently. Use a soft brushor an old toothbrush. Remove any leftover dirt. Be sure to scrub all corners. Avoid damaging the parts. Rinse them with clean water. Dry them with a soft cloth. Ensure all parts are dry before reassembling. This keeps the carburetor working well.
Inspecting For Damage
Inspecting for damage ensures your Toro lawn mower carburetor stays clean and functional. Check for cracks or leaks before cleaning. These issues can affect performance and require immediate attention.
Checking Seals And Gaskets
Seals and gaskets keep the carburetor working well. Look for cracks or wear. Damaged seals can cause leaks. Leaks make the mower run poorly. Replace any damaged parts. New seals will stop leaks. Ensure gaskets fit tightly. Loose gaskets can also cause problems. Tight gaskets help the mower run smoothly.
Examining Metal Parts
Metal parts must be clean and rust-free. Rust weakens parts. Weak parts can break. Use a brush to clean rust. Check for bent or broken pieces. Broken parts can stop the mower. Bent parts might not fit right. Replace bent or broken parts. Ensure all parts move easily. Moving parts should not stick.

Credit: www.reddit.com
Reassembling The Carburetor
Cleaning the carburetor in a Toro lawn mower requires careful reassembly. Ensure all parts fit snugly to avoid leaks. Tighten screws securely for optimal performance.
Reattaching Jets And Needles
Place the jets back into their spots. Secure them tightly. Make sure each needle is in the right hole. Check for any dirt or grime. Clean it off if needed. All parts should fit snugly.
Securing The Float Bowl
Attach the float bowl to the carburetor. Use the screws to hold it firm. Ensure the gasket is in place. It prevents leaks. Test the float by moving it. It should move freely. Tighten everything without forcing. Your carburetor is ready to use.
Installing The Carburetor Back
Carburetor installationis simple. Place the carburetor onto the engine. Make sure it is secure. Use your screws to tighten it. Tighten evenly. This keeps the carburetor in place. Check for any loose parts. Ensure everything fits well.
Connecting Fuel Line
Attach the fuel lineto the carburetor. The fuel line carries gas. Make sure it’s not twisted or bent. A bent line stops fuel flow. Push the line onto the carburetor nozzle. Secure it with a clamp. The clamp keeps it tight.
Testing The Lawn Mower
Start the lawn mower. Listen to the engine. A smooth sound means success. If the engine stalls, check connections. Check the fuel line and carburetor. Look for leaks. Fix any problems. Test again. Ensure the mower runs well.
Credit: www.briggsandstratton.com
Maintenance Tips
Keep the carburetor clean for better performance. Dirt can slow it down. Use a soft brush to remove dust. Check for loose screws and tighten them.
Fuel filters must be checked. Replace them if clogged. Use a clean cloth to wipe the carburetor. Be gentle while cleaning. Make sure all parts are dry before using.
Always use clean fuel. Dirty fuel can harm the engine. Regular checks can help avoid problems. Good maintenance keeps the mower running smoothly.
Conclusion
Cleaning your Toro lawn mower carburetor isn’t complicated. Just follow the steps carefully. Regular maintenance keeps your mower running smoothly. A clean carburetor helps the engine perform better. It also extends the mower’s lifespan. You avoid future issues with proper care.
Always use suitable tools and materials. Take your time to ensure thorough cleaning. A well-maintained mower saves time and effort in the long run. Now, enjoy a clean, efficient lawn mower. Ready for the next mowing session. Keep your lawn neat and tidy.
Happy mowing!